After we create several objects using bevel, screw, and spin tool, now we will add a glass material on one of the object we made. Open your glass object file or if don’t have one, just use blender monkey default object for this practice purpose.
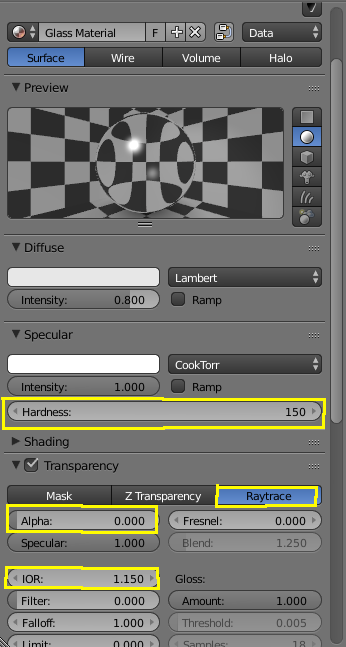
On material editor, click New button and set the Specular : Hardness = 150, check Transparency box ( Raytrace ), Alpha: 0, and IOR: 1.150. Or you can just see from this picture:
Reflection Effect:
Beside a transparent glass, another way to make it realistic is adding a reflection effect object. I want a strong reflection, so I make a white plane object. The plane material is Emitter with maximum value is 2. Place the plane object top behind of your camera object.

Back to glass object to make a reflection effect visible, check Mirror box with Reflectivity = 1.0 (maximal), Depth = 3 for the details, and most important is the combination of Fresnel and Blend like picture below. The bigger Fresnel value you have, will give you less transparent distortion.

To get more proportion light, you can add 2 more lighting like Hemi and Point Light. Just play with it. You soon learn the different effect they give on your scene.
I hope this quiet short blender 3d glass material tutorial for beginner is useful for you. Please give this posting some love by sharing it on social media and subscribe to this blog. Thank you for reading, guys!.