After I’m taking a break from Blender 3d tutorial for beginner, now I’m back with a simple tutorial article about how to create a checker board texture in blender3d. Because we only want to learn adding checker texture, you can download its 3d model free from free3d. You don’t have to join the site, just search the site and look specifically for blend file.
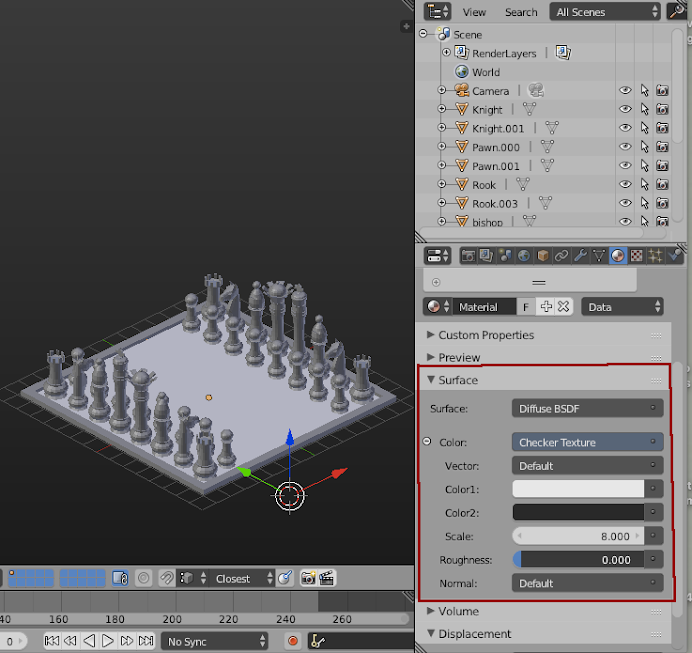
Now, open the blend file and if your model already have material, remove them one by one if it’s necessary. Also, make sure you’re in Cycles Render. Next, select the main board and create new material. Choose Diffuse BSDF on Surface and Checker Texture on Color. Most important thing is the scale value. It depends on the size of your knight, pawn, etc. I set my scale to 8. See picture below for more details:
Try to render it. Mine looks like this:

Glass BSDF Material for Chess:
For the chess itself I want to add a glass bsdf material. Personally I think it will look different and pretty cool because its an opposite with wood material that people usually use. So, let’s try that.
The first chess set I want to use maybe blue color ☺. Here the setting details:

By the way, the model I’ve downloaded already group the checker to its own function. So I create the material for pawn first and link it to the rest of them using Shift -→ L -→ Materials command. Remember, select the pawn object the last one.

And for the second set of checker, I use yellow color. Repeat the same process like above. Here’s how the final result should look like:

If some of you probably still find it confuse to follow, don’t worry, subscribe to my youtube channel, cos the video version upload soon. Thank you for spare your time visiting my blog, hopefully you like the content I provide. Make sure to sharing them, friends!.