When we’re working on UV Map mode, sometimes we face a problem where the image map is in wrong size and direction. And many beginner user don’t know that we actually can use transformation command when working on UV Image Editor. I don’t want to waste your time anymore, so let’s get started.
By the way, we will use a smartphone model for this tutorial. Again I downloaded the 3d model from free3d.com. Open the blend file and remove the already applied screen material. Make sure you already have your own screen wallpaper and on Cycles Render mode.
Select the smartphone screen object and create a new material. On Surface choose Diffuse BSDF and Color = Image Texture.

If you try to render, it will only show a blank blue color. To fix it, you need to enter edit mode, select the top face, and press U on keyboard. The U shortcut will bring UV Mapping dialog option and you need to choose Unwrap. The image is show up but when I try to render it, it’s kinda flip.
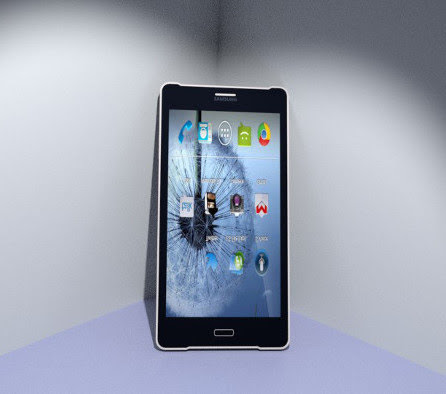
We need to solve the problem by open UV/Image Editor and bring the image by search from browse image to be linked. Your task is just to rotate, scale, and move the UVMap area until the image sit perfectly. Here’s the result after some transformation command.

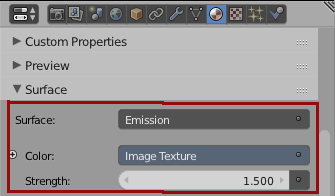
If you want the screen have more lighting & some reflection, set the Surface = Emission and Strength = 1.5.
Easy, right?. Hopefully, you find this How to Fix UV Map Size and Orientation in Blender 3D useful. Don’t forget to subscribe to my youtube channel for the video version of all my cgi tutorial. Thank you for reading my blog, join my newsletter, and have a wonderful weekend!.