We meet again, finally!. Sorry for the long hiatus break, but I’m here again and ready with the new cg tutorial, and this time I choose LibreCad. LibreCad is a free CAD program for all platform. For a person with architecture background, I haven’t draw in CAD program for at least 5 years. My transition is like Autocad —> SketchUp —> Blender 3d —> LibreCad.
I just use LibreCad for 2 months to draw a simple floor plan. My honest opinion is the software still have limitation when it comes to architectural planning, specially for its edit tool. For more clean and effective workflow I still choose Autocad I guess. Or maybe I haven’t discover all the trick yet :). Anyway, if you just want to draw a simple floor planning workflow, LibreCad get the job done.
In this tutorial serie post, I will show you how to draw a 2d wall object that created by using line, offset, mirror, and other tool. But, before that, let’s get to drawing setting first. Every time you work on a single .dxf file, you need to set up its option. You also can set up application preferences at the same time, but only do it once.
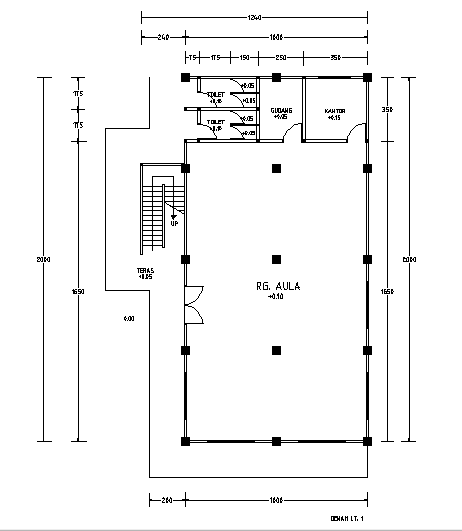
Go to Option and click Current Drawing Preferences. Here you can set the paper size & orientation, drawing unit, grid, dimension, and splines. And for the Application Preferences, you can set its appearance and drawing unit. Now, let’s get to the workflow. Above you can see a simple 2d floor plan that I will show you the workflow.
Create a Layer:
First, you need to create a new layer called AS (the middle line of wall object). On Layer widget, click + sign and fill all the box as you want.

Draw a Line:
Just like other CAD program, when you draw a line you need to enter x and y points. In Autocad, you can just type the dimension length/width, but you can do that in LibreCad. The easy way (at least for me) to enter the dimension is by click, drag, and always pay attention to status bar. Also don’t forget about the snap feature. You can active/deactivated its option while you working.

Copy Object:
To copy, you need to pick the object first then go to modify choose Copy/Move. Don’t forget to pick your reference point first. After that a window will appear and ask you if you want to delete, keep, or multiple copies.

Offset Object:
Another way if you want to create a line that parallel with the original is by using offset tool. Click on Modify icon and choose offset. Pick an object, and then press Enter. On Status Bar fill the distance value example 500. Place your cursor to the direction you want, and click.

The length of this floor plan is 20 m. So I need to copy this object. I use multiple copies for this task.

I think this is the end of LibreCad Tutorial: Simple Floor Plan Workflow Pt.1. If you find difficult to follow the article version you can watch the video on my youtube channel. Subscribe this blog and follow my social media so you won’t miss part 2 of this serie.
See you soon, friends.