Third method we will use to create a twist kinda object is Spin Tool. The difference between 2 previous method with the spin tool object is it has to be a Mesh and not a Curve/Text. But, before we get to the main topic, please check my old tutorials that have related subject with this posting.
- Lathe with Bevel Technique (Bowl)
- Experiment More with Bevel (Vase)
- Ceramic Object with Screw Modifier
- How to Make Wicker Basket
All above is blender 3d tutorial.
Now, please create a glass section curve like below:
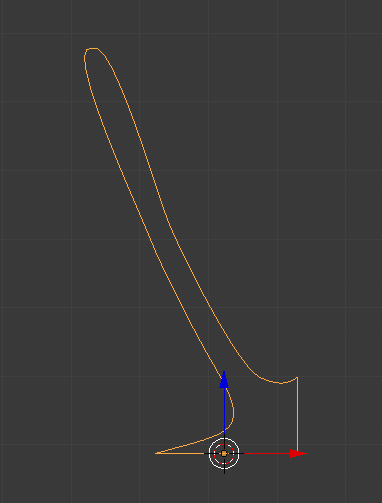
After you’re done, Back to Object Mode and press Alt + C —> choose menu Mesh From Curve/Meta/Surf/Text. Next enter Edit Mode, select all Face (A) and on Tool Shelf click Spin button.

Weird shape, huh?. Don’t worry, we can fix it by change the Spin Editor like mine below:

Wow, it’s still look weird for a glass. Specially the base section hahaha. Anyway, you get the point, right?.
Extruding:
One of the advantage to use spin tool on mesh object is we can manually modify its shape as we like. Still on Face mode, add more Face with Extrude command (E)to create its handle. Use Rotate (R) if it’s necessary.

Poke Face:
I want to add more effect so our glass look more cool. Make sure you’re on Face mode, select all around Face like what I did below:

And then press W —>Subdivide. Now we have more Faces, right?. Here’s the exciting part where we will make a triangle Face. Press Ctrl + F —> Poke Faces. Set the Poke Offset value to -0.150. Try to render it.

Is it still look weird?. Hmmmm. I can imagine Jon Snow drink wine from it :).
If you following this tutorial, I’m sure each one of you will have a difference glass shape. It’s interesting to see the result. Please tweet me a photo of it. Subscribe and share this article with your 3d friends and thank you for reading!.