Before blogspot/blogger add contact form on their gadget list, user used to had 3rd party contact form like Kontactr. It’s so awesome blogspot/blogger makes improvement and finally listen to user demand. Adding contact form on your blog is very useful, specially if you re a designer, artist, or photographer and have your artwork display on your blog. It’s a great tool for people to reach you for networking or just want to say Hi.
Now, to add contact form gadget on blogspot is very easy for beginner. Just follow this simple tutorial below:
1. Log in to your blogger dashboard, and enter LayOut tab. Click on Add Gadget link. If your template have add gadget on footer, choose that area. I think best position to place contact form is on the footer area.
2. On your blogger basic gadgets list, search for Contact Form, and click the add button.
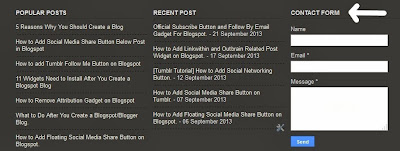
3. Place the gadget on footer like result pic below.
When someone contact you via this gadget. It will delivery directly to your gmail with the title Blogger Contact Form: [Site Name] New Message Received. On the bottom gmail will inform you which blog the message was sent. So, you won’t confuse if you have multiple blog and use 3rd party contact form gadget.
Comment below, if you have any question. Thank you for visiting!.


any ideas on what to do if the contact form won't send when you hit the submit button?
Hi Jerad. Im not sure if its possible the message wont send when you hit the button. I mean its google official gadget. it should work fine. its work fine for me.
Or alternative, you can create "contact me" page with your email in it.