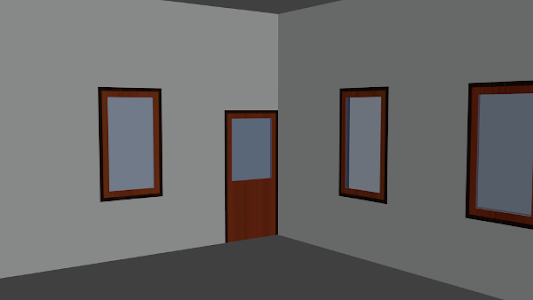
This is part #3 from our blender 3d house tutorial. And this time we will add door and floor object. For the door, the process is same with how we make windows. So please check that link first, because I won’t repeat the instruction. And for floor, we will build it from Curve object.
My set dimension for the door’s hole is X:1m ; Y:15cm ; Z:2m. Apply boolen modifier ( operation: difference and object: carve ), and move it to second layer. I then copy the frame and glass object, and edit it to make it look like a door. You can be creative as you like.
Now we already have the wall, the next step is make a hole for window and door. This tutorial is a little bit complicated at first, but once you understand the idea, it’ll be easy for your next project.
Create a cube object that have the same size with your window. I make mine X:90cm ; Y:40cm ; Z:1.5m. Make sure your Y value is bigger than wall’s thickness.
From one blender 3d tutorial series to another blender 3d tutorial series. After you know to make a dramatic lighting, now we’ll create an architecture object, a house. We only want make a simple house from cube with precision in meters unit. In this first part, we’ll planning and modelling a wall without add on.
Planning:
Open Scene Editor and set the scene unit in Metric.
In Blender 3D, there is a feature that almost have a same function as bone called Lattice. It’s a simple to apply. I’m gonna show you how and you can decide later which one you prefer. We will practice by create a X letter.
Make a cube and rotate it 45d to X Axis.
Remove all the transformation pattern by press Ctrl + A —> Rotation & Scale. If we’re not remove them, the shape will look weird when we extrude X object.